Baking Challenge: The Opera Cake - 5.28.2026
What Even Is This Cake?
I've been baking for some time and have tackled recipes of various difficulties, so I thought it would be a perfect time to take on a well known baking challenge: The Opera Cake. This dessert consists of three layers of sponge cake soaked in a brandy-coffee liqueur along with a coffee french buttercream and a chocolate ganache. I have never homemade a french buttercream in the so called "correct" way, so this was the main aspect of the recipe which I was stressed about. However, the large number of steps gave me plenty of room to make mistakes, so I was generally nervous about this project. But that has never stopped me before and certainly wasn't going to this time, so I got to work.
Step One - The Sponge
So...I don't think I've ever actually made a sponge cake before this, but no matter; It was simple enough. I was incredibly shocked by the number of eggs the recipe called for, which I guess I wouldn't have been If I had thought about the fact that I was making basically an entire cake's worth of merengue. If you don't know already, merengue is entirely made up of egg whites beaten for an excruciatingly long time until they become a foam. And god forbid you have a speck of fat left on any part of the mixer, or the eggs will remain runny forever. Luckily for me, I had properly cleaned devices and my merengue turned out just fine. I then mixed the other half of my one million eggs with the flour/sugar and folded the merengue into it. Now, it was time to Bake the Cake.
So I Baked the Cake. 450 F if you care.


Step Two - The Liqueur
This step was quite simple with very little room for error, which was great since I was trying to hype myself up for the buttercream. All that is necessary for this step is to mix espresso powder with water until dissolved and then heat the mixture with sugar to dissolve that. Finally, I added a bunch of brandy and was done with this step. Did you ever think baking could be this simple? You won't after the next step. And yes, I used instant coffee even though everyone said not to. Cry about it.

Step Three - The Buttercream
French Buttercream...scary. The first bit is basically the same as the previous part, where I dissolved coffee and sugar with water. However, instead of removing the mixture from the heat to add alcohol, I needed to leave it on the stove until it reached the soft-ball stage, which is around 238 F. So I whipped out the trusty candy thermometer and left the sugar mixture to boil. While that was happening, I prepared the large number of butter cubes and whipped egg yolks for the next step of the process. Once the thermometer finally read the desired temperature, I carefully added the hot liquid to the eggs,mixing the entire time. I was worried for this step, but managed to complete it without scrambling the eggs. With this completed, all that was left was to add the butter a couple squares at a time and mix until the frosting no longer matched the appearence of cottage cheese. And with that, the buttercream was complete. If I'm being honest, I breathed a little sigh of relief once it was finished.


Step Four - The Ganache
After making the cakes and writing this post, I realized I had not documented the making of the ganache in any capacity. I will note that it was relatively simple and I encountered no difficulties in heating the chocolate and butter to create a smooth mixture. This was the final ingredient I would need to put the cake together.
Step Five - Assembly
With all the parts of the cake complete, all that was left was to assemble them into a three layered cake. I first trimmed the edges of the cakes to create a rectangular shape and then divided each one into three evenly sized rectangles (hamburger style for those in the US). I moved one part of each cake to a serving plate so they were side by side and used a pastry brush to soak them in the coffee-brandy syrup.


Once both were sufficiently covered, I applied a layer of Buttercream and placed the next cake layer on top. This layer got the same treatment as the first, and was subsequently covered in a layer of chocolate ganache and the final sponge cake rectangle. This final layer was soaked with the syrup as before, and then recieved the remainder of the buttercream.

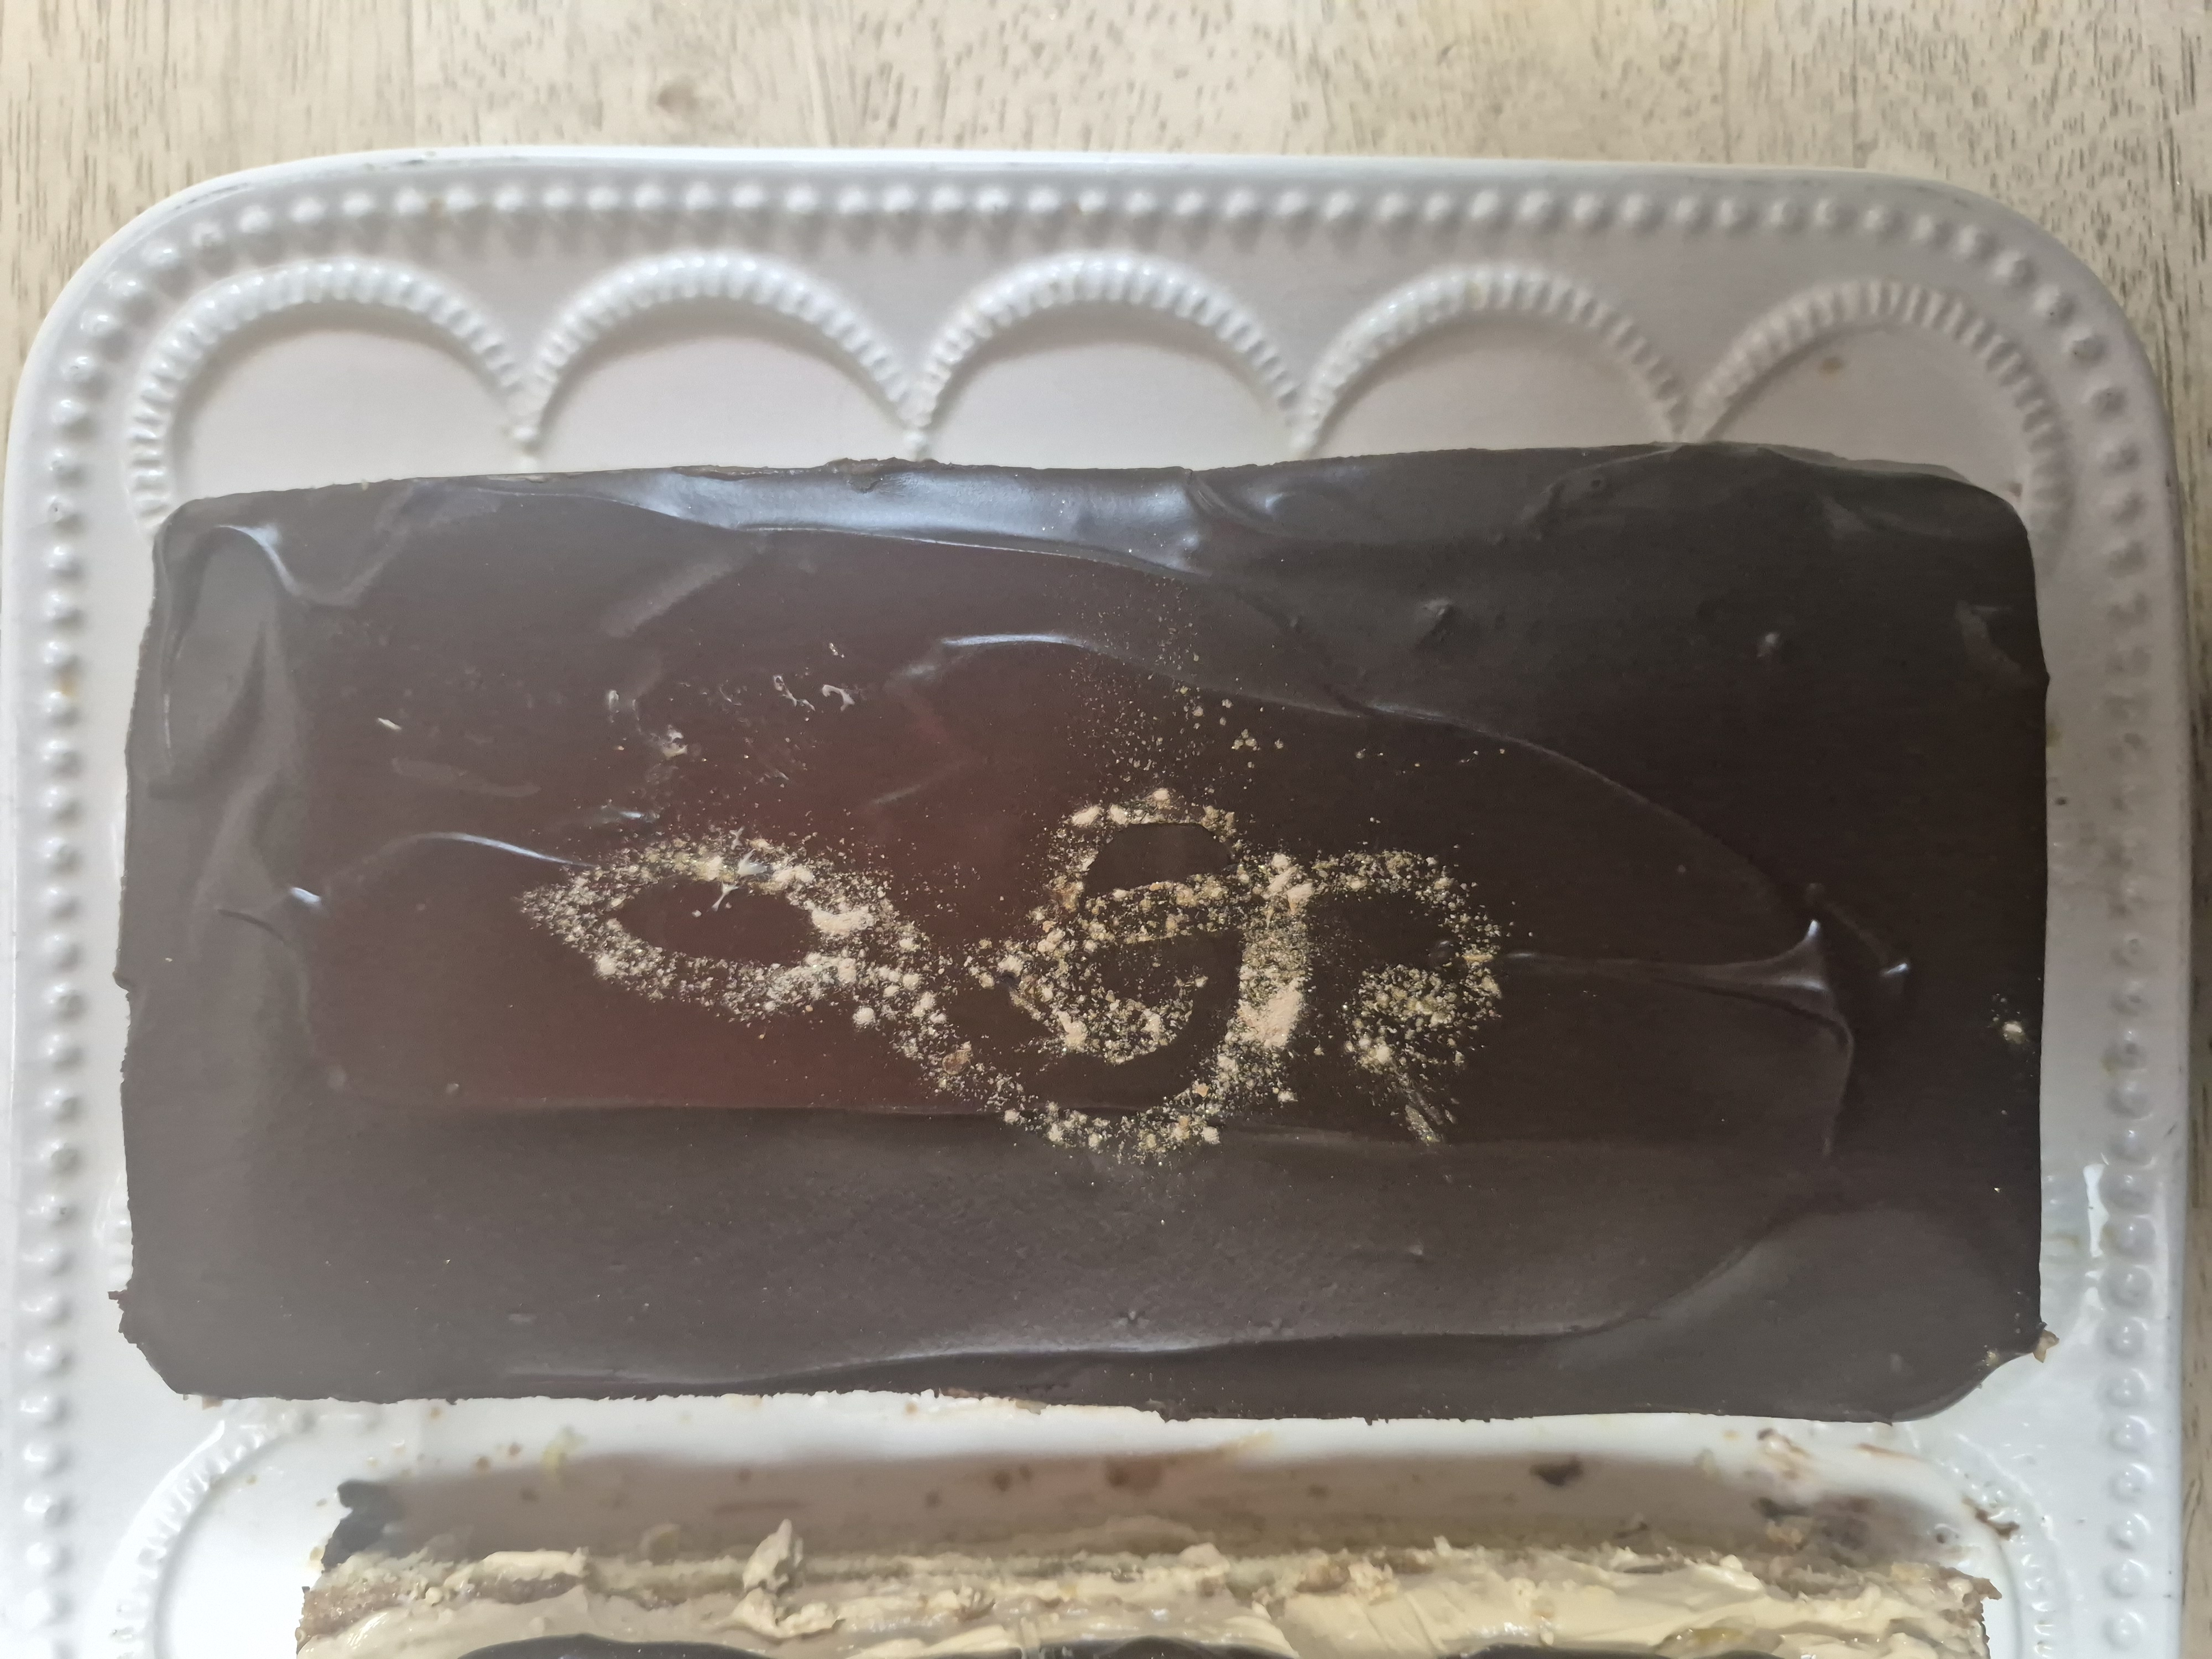
I chilled the cakes in the fridge for around 15 minutes before adding a layer of chocolate ganache to the top and placing it back into the fridge to set. while everything cooled, I made a stencil for the gold dust I planned to sprinkle on top in the shape of the treble clef which is so often placed on opera cake. With that final step done, the cake was complete and ready to be consumed


Final Notes
I am extremely happy with how this cake turned out. I found it to be a much easier project than I has initially supposed, and suspect I will be creating another such confection in the future. If I do, I will likely make a few changes in an attempt to perfect the recipe. The first imperfection I would like to address is the thickness of the layers. The recipe I used indicated that I would use all of the buttercream and ganache, so I did not pay a large amount of attention to how much I was applying onto the cake. This led to there being too much of these ingredients for the sponge cake to be fully tasted. In the future I will put more energy into making certain that each layer is the same thickness in order to fully bring out all the flavor. I also found that the cake had a much better taste and texture at close to room temperature than it did directly out of the fridge (a fact which is likely obvious to any connoisseur) so I would recommend a person to prepare in advance if they plan on serving it. Overall, I would describe this experience as a positive one, and I look forward to partaking in more baking challenges in the future.